[HTML] HTML 기본 내용 정리(표, 이미지, 리스트, form, 오디오, 비디오 등)
[HTML] HTML 기본 내용 정리(표, 이미지, 리스트, form, 오디오, 비디오 등)
1. p 태그 (단락 paragraph)

<!DOCTYPE html>
<html>
<body>
Hello! This site URL is https://aigong.tistory.com
<p>Hello! This site URL is https://aigong.tistory.com</p>
<p>Hello! This site URL is https://aigong.tistory.com</p>
<p>Hello! This site URL is https://aigong.tistory.com</p>
</body>
</html>
단락은 p 태그로 정의, 단락마다 여백이 생김
2. br 태그 (break)

<!DOCTYPE html>
<html>
<body>
Hello! This site URL is https://aigong.tistory.com<br>
Hello! This site URL is https://aigong.tistory.com
Hello! This site URL is https://aigong.tistory.com<br>
Hello! This site URL is https://aigong.tistory.com
</body>
</html>
종료 태그를 가지지 않는 줄 바꿈 태그
3. pre 태그 (previously formmatted text)

<!DOCTYPE html>
<html>
  <body>
    <pre>
      Apple

      Tiger

      Cat
    </pre>

  </body>
</html>
pre 태그는 입력한 그대로 화면에 표시하기 위한 태그. p 태그에서는 스페이스와 줄 바꿈이 제거된다.
4. 주석
<!-- 주석으로 적고자 하는 말을 적음 -->
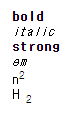
5. 텍스트 서식 관련 태그 (b, i, strong, em, sup, sub)
<!DOCTYPE html>
<html>
<body>
<pre>
<b>bold</b>
<i>italic</i>
<strong>strong</strong>
<em>em</em>
n<sup>2</sup>
H <sub>2</sub>
</pre>
</body>
</html>
b 태그 : bold
strong 태그 : strong
em 태그 : emphasized
sup 태그 : superscript
sub 태그 : subscript
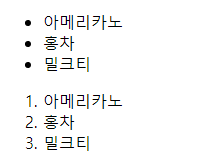
6. 리스트 ul, ol
<!DOCTYPE html>
<html>
<body>
<ul>
  <li>아메리카노</li>
  <li>홍차</li>
  <li>밀크티</li>
</ul>

<ol>
  <li>아메리카노</li>
  <li>홍차</li>
  <li>밀크티</li>
</ol>
</body>
</html>
ul : unordered list 번호 없는 리스트
ol : ordered list 번호 있는 리스트
7. 하이퍼 링크 a

<!DOCTYPE html>
<html>
<body>
<p>Hello!<br>
This site URL is <a href="https://aigong.tistory.com" target="_blank">https://aigong.tistory.com</a></p>
</body>
</html>
a : anchor : 다른 페이지나 문서 위치로 이동할 수 있음
속성 href는 링크의 목적지를 나타냄
속성 target은 링크가 클릭되었을 때 어디에 열리는지 설정
_blank : 새 창에서 열림
_self : 현재 창에서 열림
속성 id은 현재 페이지의 다른 위치로 이동
This site URL is <a href="#url1">https://aigong.tistory.com</a></p>

...

<a id="#url1">aigong</a> url is valid.
8. 이미지 img

<!DOCTYPE html>
<html>
<body>
<img src="lavenders.jpg" width="600" height="400" border="2" alt="Lavender">
</body>
</html>
속성 width, heigh 가로와 세로 사이즈 지정, 픽셀 기준
속성 alt 이미지를 화면에 표시하지 못했을 때 표시되는 대체 텍스트 alternate text
9. 테이블 (표) table

<!DOCTYPE html>
<html>
<body>
<table border="1">
  <caption>취미 조사</caption>
  <tr>
    <td>이름</td>
    <td>성별</td>
    <td>핸드폰 번호</td>
    <td>취미</td>
  </tr>
  <tr>
    <td>김사랑</td>
    <td>여</td>
    <td>010-0000-1111</td>
    <td>책 읽기</td>
  </tr>
  <tr>
    <td rowspan="2">익명</td>
    <td>남</td>
    <td>010-2222-3333</td>
    <td>드라마 보기</td>
  </tr>
  <tr>
    <td>남</td>
    <td>010-4444-5555</td>
    <td>영화 보기</td>
  </tr>
  <tr>
    <td>김희망</td>
    <td>남</td>
    <td colspan="2"> 비밀 </td>
  </tr>

</table>
</body>
</html>
tr 행 태그
td 열 태그
rowspan 행병합
colspan 열병합
caption 테이블 제목
border 경계선 두께
10. 오디오 audio

<audio src="Levitating.mp3" autoplay controls></audio>
audio 태그를 이용하여 음악 재생
속성
autoplay : 자동적으로 재생 (저는 안되던데요...)
controls : 브라우저 오디오 재생 제어기 표시
loop : 오디오 반복 재생
11. 비디오 video
<video width="640" height=""480" src="Levitating.mp3" autoplay controls></video>
12. iframe
<iframe src="name.html" width="300" height="300"></iframe>
iframe은 웹 페이지 안에서 다른 웹 페이지를 표시할 때 사용
13. div, span

<!DOCTYPE html>
<html>
<body>
<div style="border: 3px solid blue">
  <h1>Animal</h1>
  <pre>
    Tiger
    Lion
    <span style="color: green;">Cat</span>
  </pre>
</div>
</body>
</html>
div : divide 페이지를 논리적으로 분리하여 사용할 때 사용
span : 텍스트를 위한 컨테이너로 인라인 요소로 사용
14. 입력 양식 form

<!DOCTYPE html>
<html>
<body>
<form action="action.jsp" method="get">
  Name : <input type="text" name="name" size="10" value="Hong"><br>
  Password : <input type="password" name="password"><br>
  Gender :
  <input type="radio" name="gender"> Male
  <input type="radio" name="gender"> Female<br>
  Coffee :
  <input type="checkbox" name="email"> Americano
  <input type="checkbox" name="email"> Espresso
  <input type="checkbox" name="email"> Latte<br>

  <br>
  Choosing the most favoriate Fruits :
  <select name="Fruits">
    <option value="Apple">Apple</option>
    <option value="Banana">Banana</option>
    <option value="Pineapple">Pineapple</option>

  </select>

  <br>
  date : <input type="date" name="" value=""> <br>
  datetime : <input type="datetime" name="" value=""><br>
  datetime-local : <input type="datetime-local" name="" value=""><br>
  month : <input type="month" name="" value=""><br>
  time : <input type="time" name="" value=""><br>
  week : <input type="week" name="" value=""><br>
  color : <input type="color" name="" value=""><br>
  tel : <input type="tel" name="tel" required
  pattern="[0-9]{3}-[0-9]{4}-[0-9]{4}"><br>
  search : <input type="search" name="" value=""><br>
  range : <input type="range" min="0" max="100" step="10" value="80"><br>
  number : <input type="number"  min="0" max="100" step="10" value="40"><br>
  url : <input type="url" name="" value=""><br>

  <input type="submit" value="Submit" onclick="Error Pop up">
  <input type="reset" name="reset" value="Reset"><br>

  <button type="button" name="button" onclick="Alert">Button</button><br>

  <br>Any opion <br>
  <textarea name="name" rows="3" cols="30"></textarea>

</form>
</body>
</html>
사용자가 서버에 보내기 위한 입력 양식을 작성할 수 있습니다. 기본적으로 사용자가 정보를 넣을 수 있는 웹 페이지
HTTP Get 요청 / POST 요청으로 나뉨
15. 반응형 창 (form 확장 공부: <picture>)

<picture>
  <source media="(min-width: 900px)" srcset="abstract.jpg">
  <source media="(min-width: 700px)" srcset="cat.jpg">
  <img src="ocean.jpg" alt="Path">
</picture>
창의 크기에 따라 다른 그림이 나타나게 할 수도 있습니다. 해당 내용은 같은 이미지 다른 사이즈로 비율을 맞추기도 합니다.
min-width는 최소 너비가 어떤 값 이상일 때 해당 내용이 나타난다는 의미입니다.
즉, 첫 번째를 읽으면 창의 너비가 900px 이상이면 abstract.jpg 파일을 가져와 picture한다는 의미입니다.
min-height, max-width, max-height도 있습니다. 자신의 기준에 맞게 활용하시길 바랍니다.
물론 CSS가 auto긴 하죠....
Reference
w3school : https://www.w3schools.com/html/default.asp
